
Double Reverse Proxy
Table of Contents
Intro
For a small project I was doing, I had to set up a Caddy reverse proxy, after a Cloudflare reverse proxy.
Everything had to be with TLS etc, and it turned out to be a bit harder than expected. So here is how I did it, so you don’t have to struggle.
Enviroment
For this post, I will be running everything locally using Docker so it’s easy to replicate and test, before pushing this to the final environment.
The concept looks something like this.

Cloudflared proxy creates a tunnel, to CloudFlare CDN. So I don’t have to open any fw ports. If you haven’t tried this, then I have a couple of blog posts, on this site, that show how. It’s a really cool solution.
The reason for using Caddy, is that I can use it, to deliver the request to the correct endpoint, based on the URL etc.
This was a specific requirement in my use case.
Also, there were some issues with CORS which restricted me from using multiple URLs. And as far as I can see, then I cannot point the same public URL in Cloudflare, to different endpoints, based on the URL, after the FQDN.
But hey. This was a great excuse for testing out Caddy :-)
If you don’t have this requirement, you can use cloudflare without Caddy, and just point it directly to the endpoint you wish, or expose Caddy directly without Cloudflare.
Setup
The environment is pretty simple, and you can find all files etc. in the Github repository https://github.com/rhjensen79/double-reverse-proxy
It consists of an env file, that contains the Cloudflare proxy token.
A Caddyfile with the configuration for Caddy.
And a Docker-Compose file, for running the entire environment.
After running it for the first time, a couple of config files might also appear, but I will keep them out of this guide.
Docker-Compose
The docker compose file looks like this
version: '3'
services:
  cloudflared:
    image: cloudflare/cloudflared
    container_name: cloudflared
    networks:
      - caddy
    environment:
      - TUNNEL_TOKEN=${TUNNEL_TOKEN}
    command: tunnel run
    restart: unless-stopped
  caddy:
    image: caddy:latest
    container_name: caddy
    restart: always
    networks:
      - caddy
    stdin_open: true
    tty: true
    volumes:
      - ./caddy:/config
      - /etc/localtime:/etc/localtime:ro
    entrypoint: /usr/bin/caddy run --adapter caddyfile --config /config/Caddyfile
    depends_on:
      - cloudflared
  nginx:
    image: nginx
    networks:
      - caddy
    depends_on:
      - caddy
  httpd:
    image: httpd
    networks:
      - caddy
    depends_on:
      - caddy
networks:
  caddy:
It creates a Caddy network and attaches the Cloudflare, Caddy, Nginx, and Httpd container to it.
This allows us to communicate with all containers, using their name.
Cloudflare
In Cloudflare, go to Zero Trust and find your Tunnel.
Once found, edit it.
Create a new public hostname.
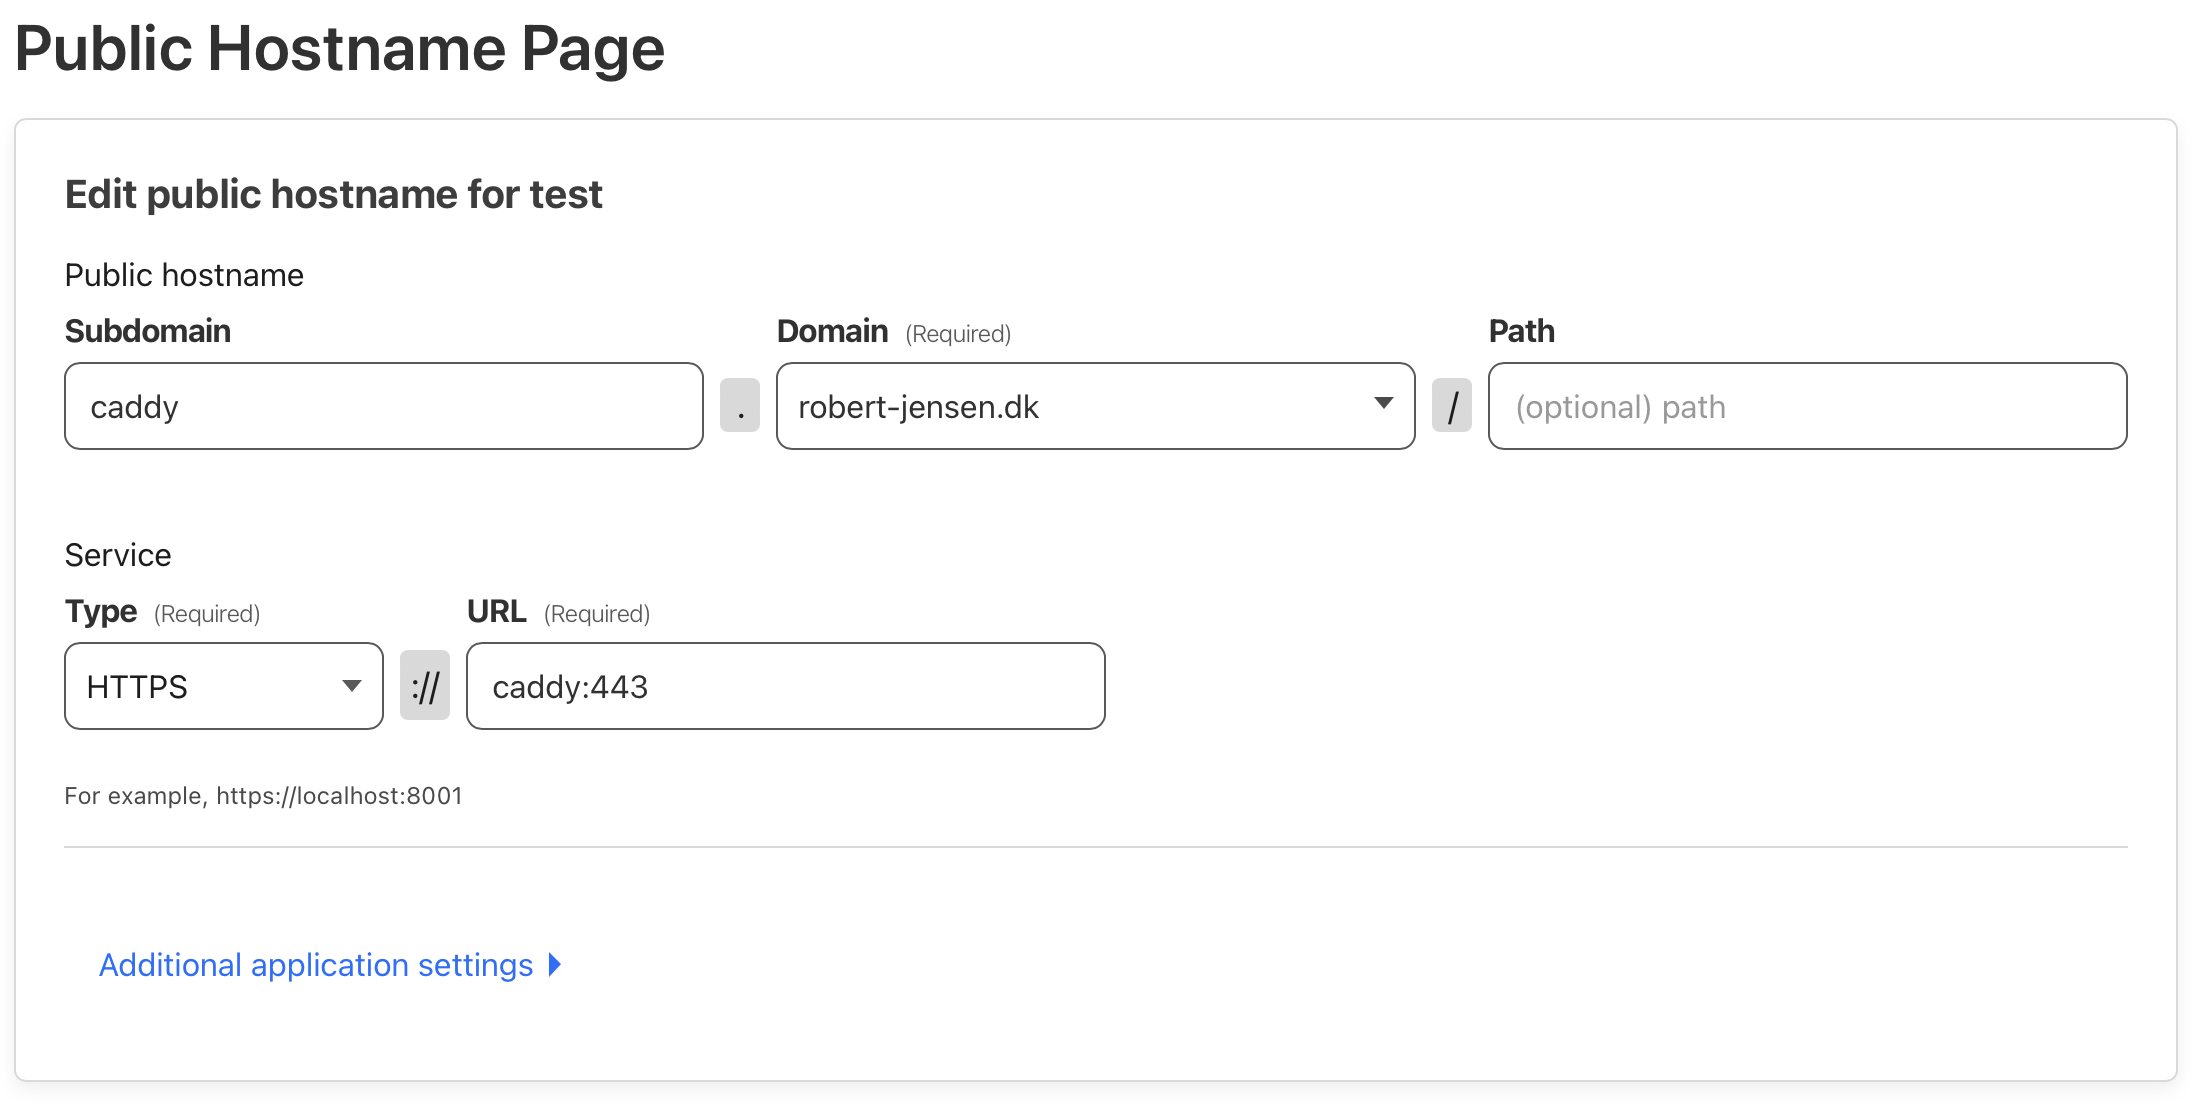 Mine is called caddy.robert-jensen.dk, but the important thing, is the service part.
Here i have selected https and the url is caddy:443 which is the internal dns name, for my container, along with the port.
Mine is called caddy.robert-jensen.dk, but the important thing, is the service part.
Here i have selected https and the url is caddy:443 which is the internal dns name, for my container, along with the port.
I have also configured one additional setting.

No TLS Verify Enabled
This is important since the certificate for Caddy is self-signed and not trusted. Caddy can pull its own certificate, from Let’s Encrypt, etc. But in this case, Cloudflare provides a certificate, so it’s not needed. This setting tells Cloudflare to ignore the certificate warning.
 Another thing is to set the
 HTTP Host Header to caddy.
This ensures that the requested URL matches the one we set in the first line in the Caddyfile in the next step.
Caddy
The Caddyfile in the repository, is what tells Caddy how to handle requests.
Mine looks like this
https://caddy {
 tls internal

 handle_path /httpd* {
  rewrite * /
  reverse_proxy http://httpd:80
 }

 handle_path /nginx* {
  rewrite * /
  reverse_proxy http://nginx:80
 }

 reverse_proxy * http://nginx:80
}
The first line tells Caddy to handle all traffic, with the destination https://caddy
Tls internal tells it to create a self-signed certificate.
And then we tell it to handle traffic with /httpd and rewrite it to / and then forward it to the container named httpd on port 80
We do the same for traffic to /nginx. Here we just point it to the nginx container instead.
In the end, we tell it that all other traffic goes to the nginx container, without rewriting it.
Test
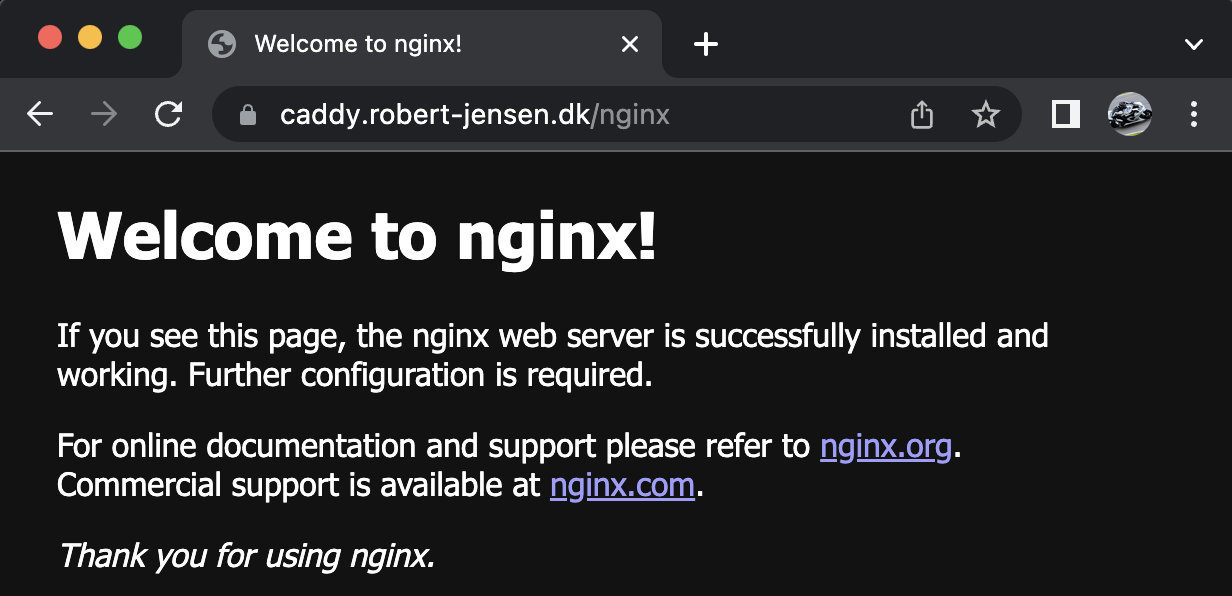
Running a simple docker compose up should provide this result for https://caddy.robert-jensen.dk/nginx
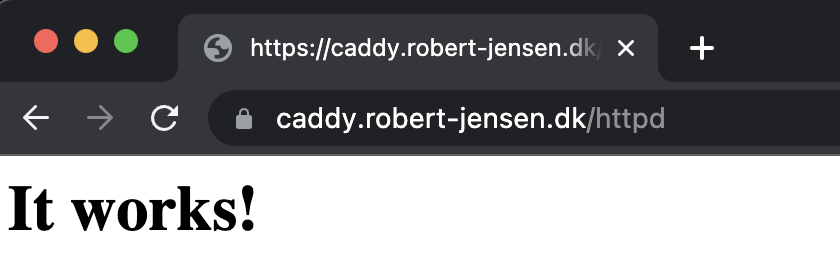
This result for <https://caddy.robert-jensen.dk/httpd>
And this result for https://caddy.robert-jensen.dk
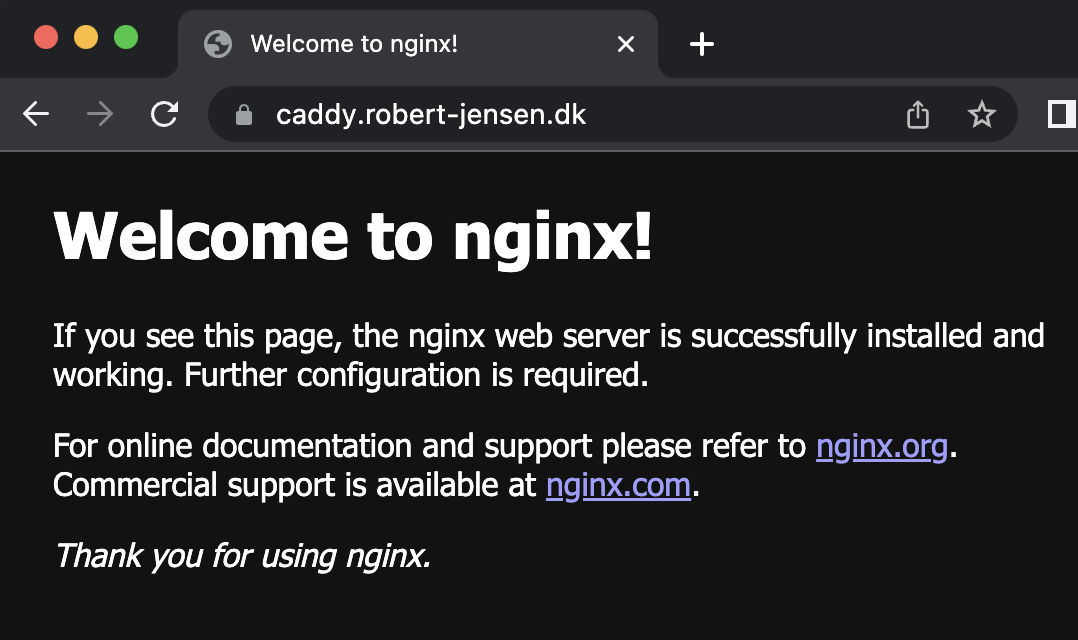
Note that all URL have a valid certificate. This is provided by default by the Cloudflared Proxy
So it’s a pretty cool solution, for exposing multiple endpoints, using Caddy as a reverse proxy.
Remember if you want to try for yourself, then find all files in the Github Repository, made for this post.
Hope this was useful, and thanks for reading this far.
Photo by Marc-Olivier Jodoin on Unsplash