
Remote Access to POD, Without Opening Firewall, on Tanzu Community Edition
Table of Contents
Intro
In this blog post, i’m gonna show you, how you can use Cloudflare to access an internal pod, running on your own machine, to the outside world. All without opening any firewall ports, and with a valid certificate, and access control. And did I mention, it’s all for free.
I will be doing all on the Tanzu Community edition. It will work on any Kubernetes distibution, Docker container etc. But when we got a cool free product, why not show it there :-)
Install Tanzu Community Edition
First off, let’s install Tanzu Community edition. I’m using a Mac, with Brew and docker already installed, so it’s really easy. If you are using something else, then you have to read thru the documentation.
Just run
brew install vmware-tanzu/tanzu/tanzu-community-edition
After that, it’s as easy as running the following, to get your first cluster up and running
tanzu unmanaged-cluster create firstcluster
After a minute or so, you should see
✅ Cluster created

🎮 kubectl context set to firstcluster
To see everything is working run
kubectl get pods -A
In my setup setup everything looks good
NAMESPACE            NAME                                                 READY   STATUS    RESTARTS   AGE
kube-system          calico-kube-controllers-59ccff4b57-mcmlx             1/1     Running   0          100s
kube-system          calico-node-4k986                                    1/1     Running   0          100s
kube-system          coredns-78fcd69978-282k6                             1/1     Running   0          2m12s
kube-system          coredns-78fcd69978-tt28j                             1/1     Running   0          2m12s
kube-system          etcd-firstcluster-control-plane                      1/1     Running   0          2m28s
kube-system          kube-apiserver-firstcluster-control-plane            1/1     Running   0          2m28s
kube-system          kube-controller-manager-firstcluster-control-plane   1/1     Running   0          2m28s
kube-system          kube-proxy-r5kd7                                     1/1     Running   0          2m12s
kube-system          kube-scheduler-firstcluster-control-plane            1/1     Running   0          2m27s
local-path-storage   local-path-provisioner-85494db59d-p5crc              1/1     Running   0          2m12s
tkg-system           kapp-controller-779d9777dc-hf7fr                     1/1     Running   0          2m12s
Create Deployment
To test our tunnel is working, we are going to create a simple Nginx deployment, and publish a service from it.
To create the deployment run
kubectl create deployment nginx --image=nginx
And then expose the service by running
kubectl create service clusterip nginx --tcp=80:80
To see all is running, run the following command
kubectl get pod,svc
This should provide the following result, showing you both have a Pod and a Service created and running. Note there is no external ip, so it’s only exposed internalily.
NAME                         READY   STATUS    RESTARTS   AGE
pod/nginx-6799fc88d8-tltz2   1/1     Running   0          34m

NAME                 TYPE        CLUSTER-IP     EXTERNAL-IP   PORT(S)   AGE
service/kubernetes   ClusterIP   10.96.0.1      <none>        443/TCP   35m
service/nginx        ClusterIP   10.96.17.103   <none>        80/TCP    30m
Setup CloudFlare Team
The thing that makes all of this work, is Cloudflare so you will need to have at least an account there, and a domain, controlled by them.
It’s free, and I have been using them, to host all my domains, for the last couple of years, so I can recommend you doing the same.
They have quite a few usefull services, that I recommend you take a look at, but it’s outside the scope of this blog post.
Once that is done, you need to login, and access their Zero Trust page.
The first time you click the link, you have to setup a team. Just pick a name that makes sense to you, and select the Free plan, you you are prompted for it.
Setup Cloudflare tunnel
To create a new tunnel, select Access -> Tunnels from the left menu, and click Create a tunnel on the right.
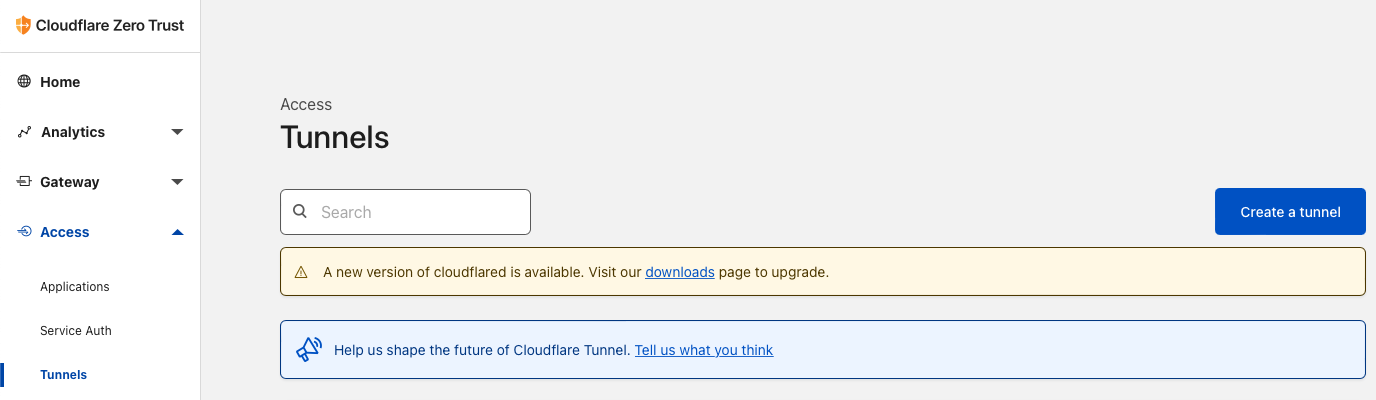
Give your tunnel a name. Note a tunnel can expose multiple endpoints, so the name should be generic. I will call mine Tanzu Community Edition

Click Save tunnel
You will now be presented with different enviroment options. The closest fit we have, is the Docker one. So click that one, and copy and save the command. We will need some of it later.
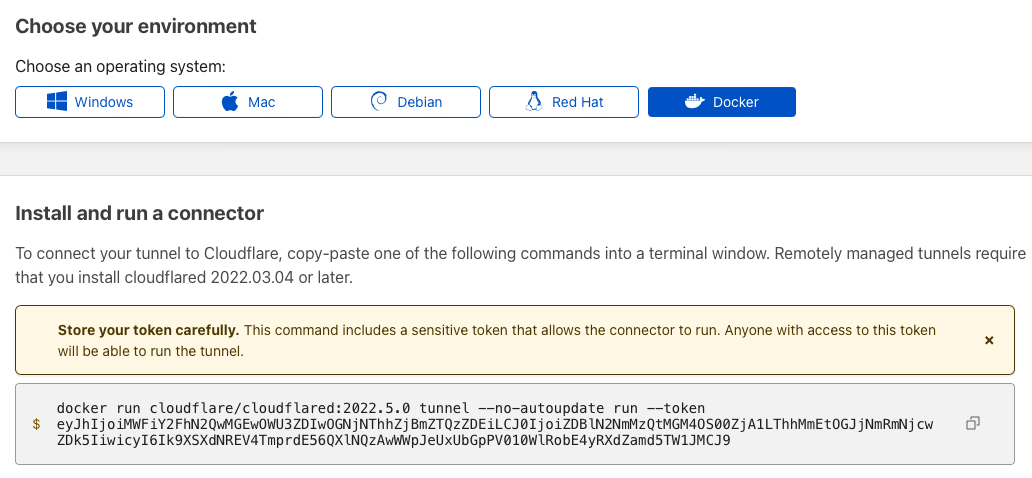
Note I have regenerated the token, so it’s not working anymore. You should offcourse not share this on the internet.
The last thing, we need to do, is to create a public url, to access our service on.
I have chosen the url nginx.tanzu.dk and i’m pointing it to the internal service, within my k8s cluster.
The cloudflare tunnel, will be deployed in the default namespace, so I can just reference the nginx service with http://nginx:80
If you need to access different namespaces, then the url would look something like this http://nginx.namespace:80
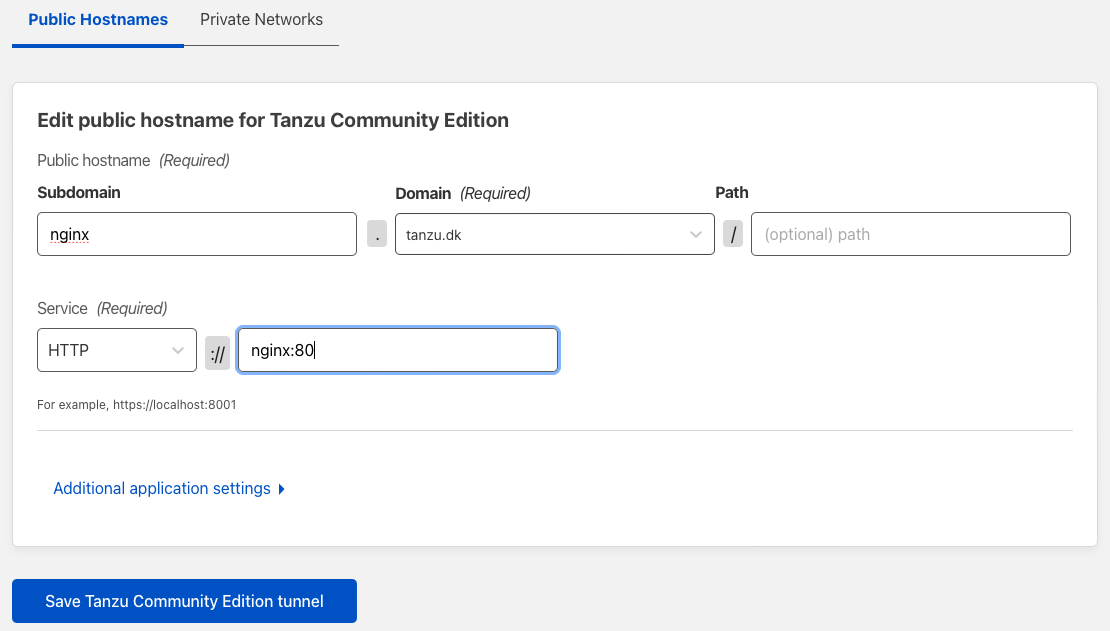
Click Save Tanzu Community Edition tunnel
You should now see a new tunnel apear, with the status Inactive.
Don’t close the website, since we will use it later.

Open DNS settings for your domain, and see a new CNAME entry has been created, with the nginx.tanzu.dk domain name, pointing to a strange url.
This is CloudFlare pointing your new record, to the newly created tunnel id.

Create container
Since i’m using an Arm Based M1, I cannot use the officiel Docker image on Docker Hub.
So I have created my own build, that works on both ARM and x86. If you are not running ARM, then feel free, to use the official one from Docker Hub.
My version, can found here and can be pulled by running
docker pull ghcr.io/tanzudk/cloudflared:latest
Deploy cloudFlare tunnel container
To get access to the cluster, we will create a deployment.
Create a file cloudflared.yaml with the following content
---
apiVersion: apps/v1
kind: Deployment
metadata:
  name: cloudflared
spec:
  selector:
    matchLabels:
      app: cloudflared
  template:
    metadata:
      labels:
        app: cloudflared
    spec:
      containers:
      - name: cloudflared
        image: ghcr.io/tanzudk/cloudflared:latest
        args:
        - tunnel
        - run
        - --token
        - YourToken
You need to replace the last line YourToken with the token, we got in the Setup Cloudflare tunnel section.
Note this is a modified version, of the official one, since I found this to work better for this usecase.
I recommend you take a look at the official one, if you want to learn more, or maybe do more advanced configurations.
To deploy run
kubectl apply -f cloudflared.yaml
After a couple of minutes, you should be able to see that your tunnel is up and running.

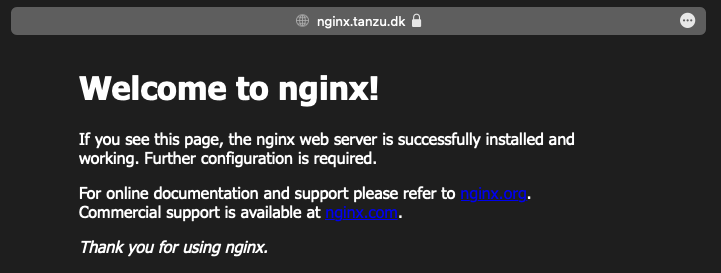
And if you connect to the public url http://nginx.tanzu.dk, we created earlier, you should now see a working Nginx website.
Note it works both as http and https with a valid certificate.
summary
So what we did here, was to create a new Cloudflare Tunnel, where we pointed the dns record nginx.tanzu.dk to the internal service https://nginx:80
We then deployed a container, with the correct token, and then CloudFlare, made sure we could connect, and made sure we had valid certificates etc.
There are many other options to explore, in this offering, lige RBAC access to the applications, using you Github org, as auth. But that is material for another blog post.
Cleanup
To cleanup and delete your running cluster, just run
tanzu unmanaged-cluster delete firstcluster
Photo by matthaeus on Unsplash